Dealers sites can be created in SalesView, providing both a unique URL and a SalesView site. Dealers will see only leads and users assigned to them. Users who aren’t assigned to a dealer will see any Unassigned leads.
| Info |
|---|
If you have a large dealer network (more than ten dealers, for example), we recommend that you have your IdeaRoom Implementation Consultant add them to SalesView initially through a bulk import. Then, you can manage individual updates in SalesView. |
Exploring Dealer Settings
A dealer site combines the details of your buildings with each dealer’s contact and deposit details (available for Carport sites only). You can search for a specific dealer using the Search box in the upper right corner of your screen.
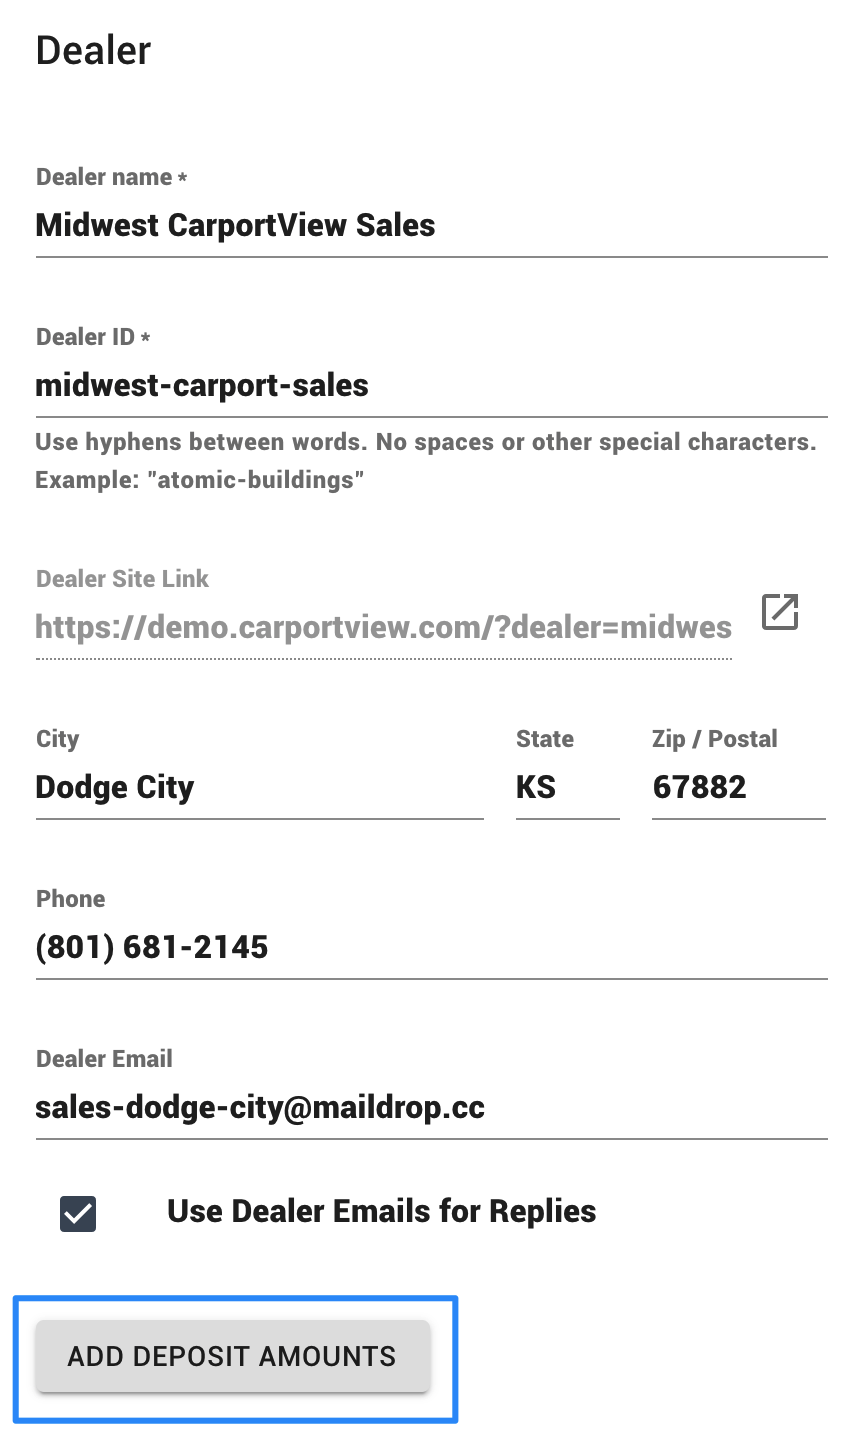
Additional details for each dealer can be found by clicking on their name on the Dealers tab. The first section of the Detailer Details dialog box, includes the following settings:
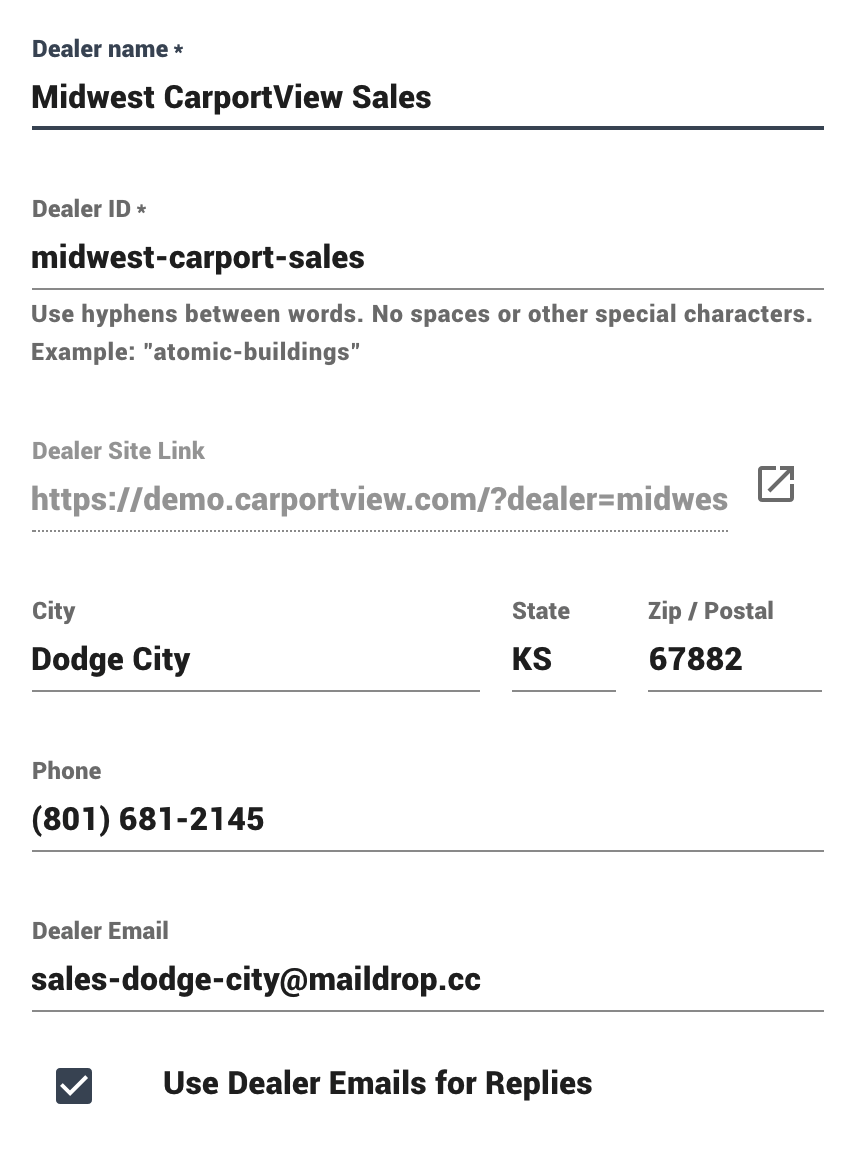
Dealer Name. A customer-friendly name that is displayed on the email that is sent to the customer.
Dealer ID. A set of characters or numbers that must be unique among all your dealers. If you duplicate an existing key, the value will not be saved. If you have many dealers, you may want to use a numbering system to ensure this value is unique.
| Note |
|---|
Do not change the Dealer ID once it has been created. If it’s changed, the Dealer Site Link will be changed as well and all leads and users in the previous site will be Unassigned. |
Dealer Site Link. A generated link to the dealer site that combines the Dealer ID with your URL. If you edit the Dealer ID, the Dealer Site Link will also be changed.
City, State, and ZIP/Postal. Included in the header of invoice-style emails.
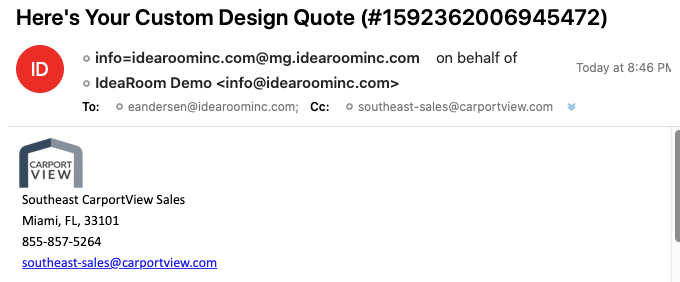
Phone. This number will be shown on emails sent to customers as well as the dealer configurator website in the contact bar. This should be the phone number where the dealer can be contacted by their customers who may have questions about their building or saved design.

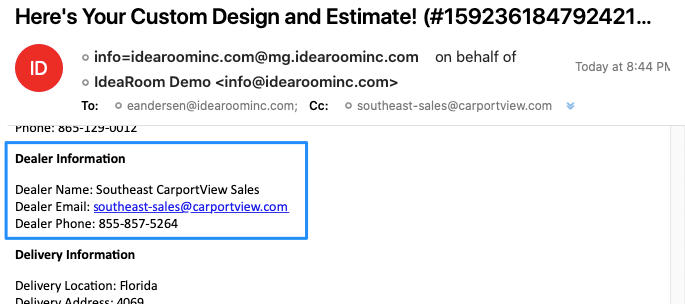
Dealer Email. The email address that is displayed in the contact bar and included on emails sent to customers. This should be the email a customer would use to contact the dealer directly.
Use Dealer Email for Replies checkbox. When a customer receives a saved design, they will often click Reply on the email to ask a question about the design. If you want the Reply email address to be the same as the Contact Email, check this box. If you want the Reply email address to be different, uncheck this box and fill in the Quote reply-to email address.
Email Address for Replies. The email address where messages should be sent after a customer clicks the Reply button on a saved design or quote.

Setting Up Deposits (Available for Carports and Buildings only)
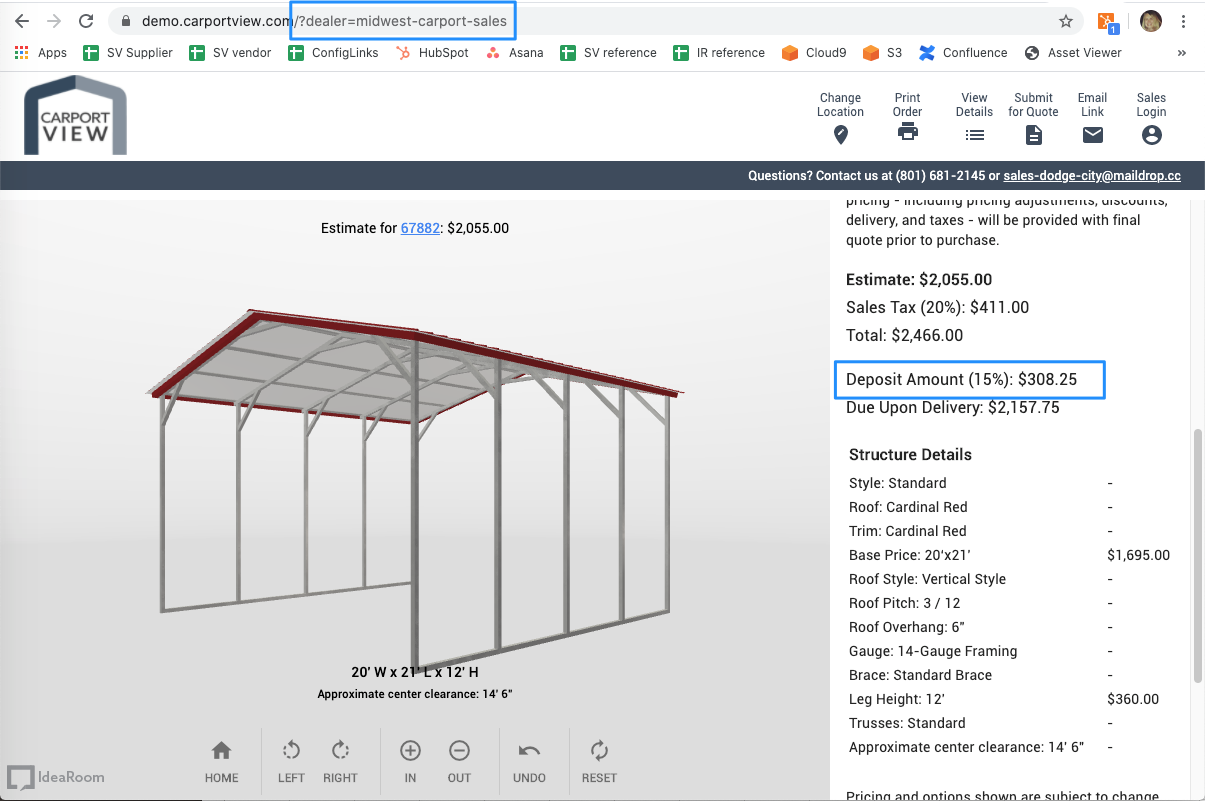
Deposits set up in SalesView for each dealer will apply when a design is saved from a dealer’s link. For example, a 15% deposit is set up for the Midwest Carport Sales dealer in SalesView:
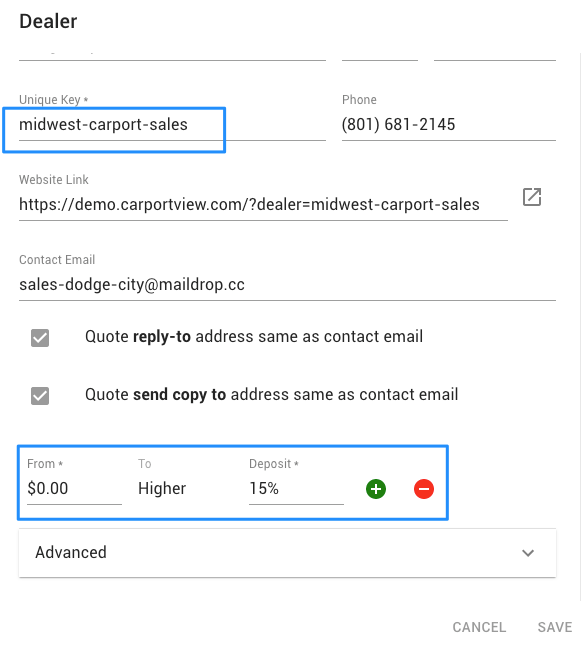
When customers visit their dealer site link (https://demo.carportview.com/?dealer=midwest-carport-sales), the 15% deposit amount is applied to their design.
A two-tier deposit is set up for another dealer, Northeast Carport Sales.
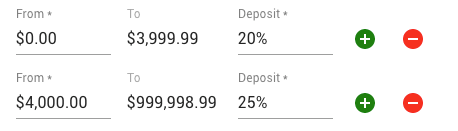
When customers visit their dealer site link (https://demo.carportview.com/?dealer=northeast-dealer ), they will see the 20% deposit for buildings that are less than $3,999.
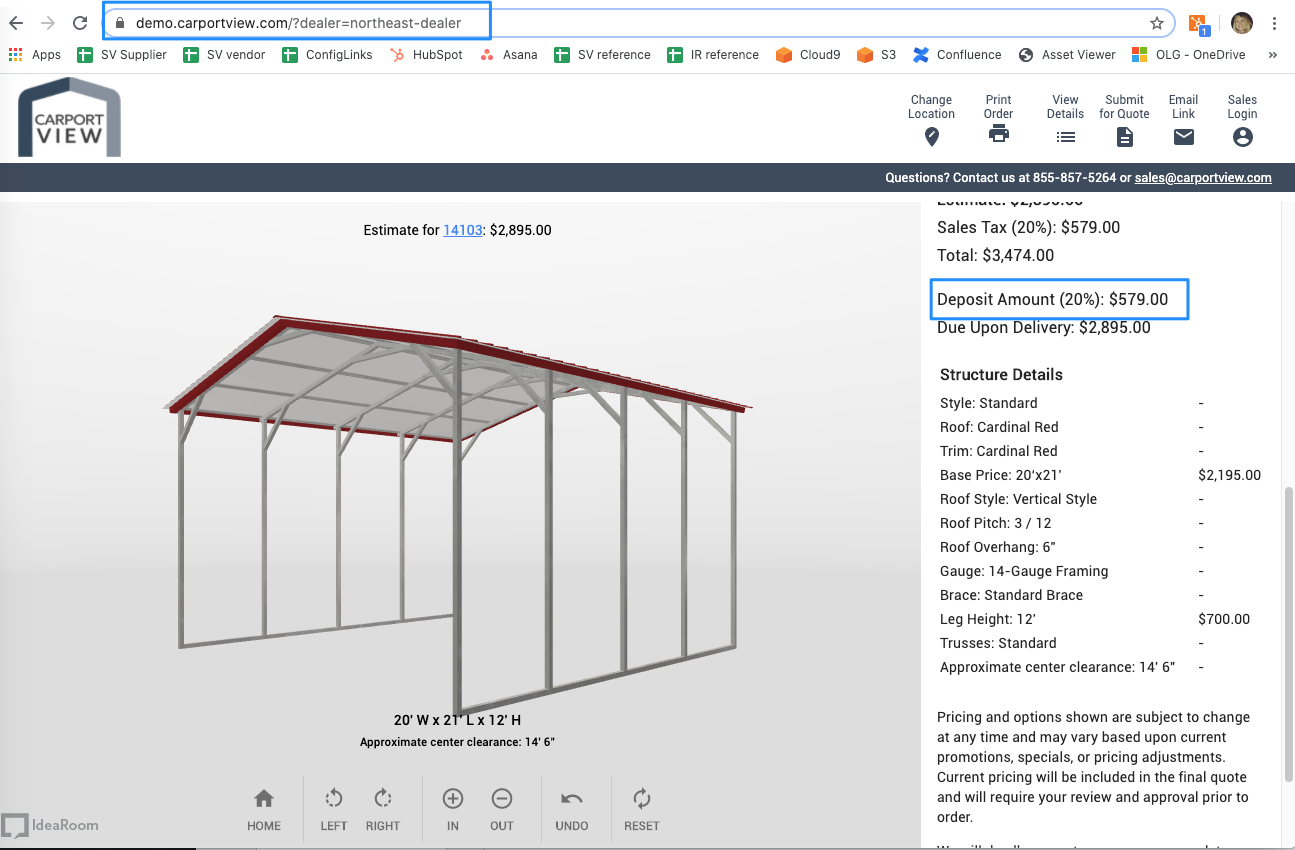
If that same customer designs a more expensive building, the 25% deposit amount is applied.

To Set Up Deposit Amounts for a Dealer
On the Dealer tab, click the dealer to open the Dealers details panel.
Click Add Deposit Amounts.
If you have imported your dealers, deposit amounts may already exist. These will be shown instead of the Add Deposit Amounts button.

For a single deposit tier, simply add the percent deposit to apply to any building. In the example below, a 15% deposit will be applied to any building, regardless of the price.

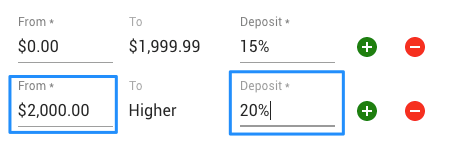
For multiple deposit tiers, click the green + button.
Under From, enter the second tier minimum price. (The To is automatically set based on the range.)
Under Deposit, enter the deposit amount for that range.
Continue to add tiers by clicking the green + button and adding ranges and deposit amounts
Click Save.
To Remove a Tier
Click the red - button to remove the tier from your deposit amount.